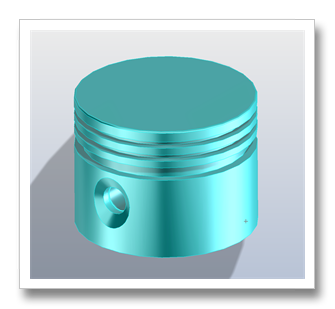
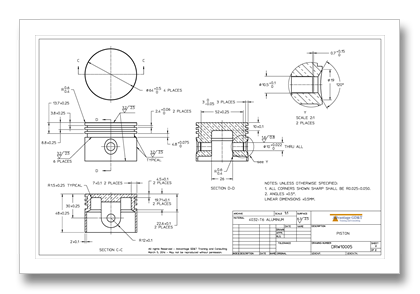
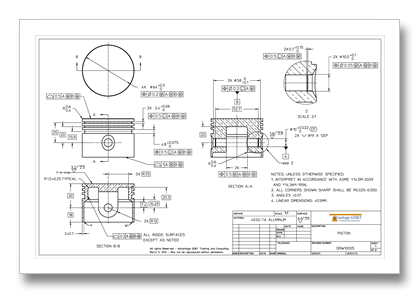
Today’s engineers have at their disposal an impressive array of design tools enabling them to simulate, and design for many of the stresses and conditions that parts are subjected to throughout the life of a product. Methods used by engineers range from hand calculations to sophisticated computer models. The design process usually begins by creating models of parts and assemblies using Computer Aided Design (CAD) software. Designers generate perfect 3D model representations of parts and assemble them into the virtual product using these CAD tools.
Unfortunately manufacturing cannot reproduce this perfection in real parts. Even modern 3D printing technology cannot produce a dimensionally perfect part. Manufacturing processes introduce dimensional variation, and this variation can have a significant effect on the performance of the assembled product. In fact dimensional variation can make the difference between success or failure of a product. Some factors that can cause dimensional variation include:
- Tool wear and machine calibration
- Differences in material properties
- Environmental changes such as temperature, humidity and dirt
- Machine operator skill
- Damaged or marred parts
- Measurement uncertainty
- Shrinkage and warping from heating, cooling and curing
Engineers need a means to determine how much the manufactured part geometry can be allowed to deviate from the perfect model geometry while ensuring parts will assemble and perform as intended in the product. These deviations are expressed on the engineering drawing in terms of minimum and maximum allowable dimensional limits and are known as tolerances. There are two commonly used methods for expressing tolerances on drawings: Coordinate Tolerancing and Geometric Dimensioning and Tolerancing (GD&T).
Engineers have recognized the effects of dimensional variation for a long time. Coordinate (sometimes called plus-minus) tolerancing has been used on engineering drawings for over a century as a means of communicating the desired part fit requirements. Coordinate tolerancing, as the name suggests, is based on an x, y, z coordinate system. Linear dimensions with plus-minus deviations from nominal are used to express the allowable tolerance limits.
Coordinate tolerancing worked okay when the design engineer and machine operator were in close proximity.
Early manufacturing involved skilled craftsman and often a trial and error approach was used to fine tune processes to ensure components fit together. As problems arose, the designer and the machinist could get together to work out a solution. Much of the knowledge necessary to repeatedly build the product was not documented and existed in the memories of the workers. Workers often stayed with the company for many years and would pass their experience of how to manufacture these parts onto their apprentices.
In the war years, part interchangeability and multiple sources of supply became increasingly important to keep vehicles, aircraft and weapons operating. Mass manufacturing of consumer goods and outsourcing of parts gained popularity in post war years, highlighting the importance of documenting and communicating part requirements. In recent decades cheaper production of higher quality products, and six sigma methodologies changed the way manufactures compete globally, and accurate measurement data became a central focus of manufacturing. More recently complications arising from attempts to offshore manufacturing has forced many in the industry to rethink their supply chain strategies. Communicating and managing product quality requirements globally has become an enormous challenge. Product geometry has become more intricate and there are a plethora of materials and manufacturing processes to choose from. Production workers no longer stay in with the same company until retirement. Coordinate tolerancing lacks the tools to fully define, document and communicate part requirements necessary for producing product using a global supply chain. Times have changed, but many engineers still insist on creating part drawings using only coordinate tolerancing.
GD&T was developed to address the inadequacies of coordinate tolerancing. GD&T allows you to specify exactly what you need for parts to function, relaxing tolerances, and controlling variations in size, form, orientation, location and profile. Unlike coordinate tolerancing, tools are provided to control axial and symmetrical relationships and patterns of features. There are even tools that allow additional variation or bonus tolerance while protecting feature function and maximizing part acceptance. GD&T specified in accordance with the American Society of Manufacturing Engineers (ASME) Y14.5 Dimensioning and Tolerancing standard, establishes uniform practices for stating and interpreting dimensioning and tolerancing requirements on engineering drawings. Using this standard ensures all specifications relay a single meaning, and are measurable.
GD&T ensures part interchangeability, allows the selection of less costly manufacturing and assembly methods, improves communication, and by helping designers account for the effects of manufacturing variation, improves design. Parts that are properly defined and inspected using GD&T can be produced anywhere in the world and fit their using assemblies without rework. Coordinate tolerancing on the other hand is based on assumptions and lacks the tools necessary to communicate functional requirements.
Check back soon for my next post, “GD&T – Working Through the Misconceptions”.
Doug Keller is Owner, Consultant and Instructor at Advantage GD&T Training and Consulting, and is certified by the American Society of Mechanical Engineers as a Senior Level Geometric Dimensioning and Tolerancing Professional.


2 Comments
This is very helpful in understanding the needs of GD&T. looking forward to new posts through e-mail
Thank you very much for the positive feedback. I’m afraid it has been a long time since I’ve posted to my blog because I have been very busy. I will try to get an article out soon.