This article is a continuation of my previous post, “Variation in Production and Why GD&T is Superior to Coordinate Tolerancing”.
Geometric Dimensioning and Tolerancing (GD&T) eliminates the trial and error approach to product design. It should be viewed as a design methodology ensuring dimensions and tolerances are developed to suit feature function and mating relationships. The following is a short list outlining the benefits of using GD&T:
- Eliminate guessing at product tolerancing, resulting in fewer prototype iterations and drawing revisions.
- Specify the maximum available tolerance for manufacturing while protecting feature function.
- Provide clear instructions for quality control by using established rules governing part setup and tolerance zone interpretation, ensuring repeatable measurement results.
- Be assured that functional parts pass inspection and non-functional parts don’t.
- Identify the exact rework requirements when manufacturing produces an out of specification feature.
- Take advantage of additional (or bonus) tolerances for increased part acceptance.
- Use functional gages to determine part acceptance, which can in many cases reduce inspection time and reliance on highly skilled inspectors.
- Control machine allowances, wall thickness and interface dimensions on castings and fabrications.
- Install large and heavy components without rework and with reduced reliance on adjustment.
- Document design information and enable tolerance analysis accounting for all geometric variation.
- Develop multiple sources of supply by providing a complete product definition with a single dimensional interpretation.
Given all these benefits, why are some engineers still reluctant to adopt GD&T?
Unfortunately many mistakenly see GD&T as making tolerances tighter, parts more expensive, or that GD&T is not applicable to their product and generally fail to see value in its implementation. Often used excuses include:
- GD&T is Complex,
- My vendors don’t understand GD&T,
- GD&T is only applicable to high volume product,
- We’ve managed without GD&T so far,
- GD&T is too difficult to learn.
I’ve heard many comments both for and against GD&T. Those who are “for” GD&T have obviously seen benefits from proper application of tolerancing in their organizations. The negative comments however also have some merit. I believe it’s important to pay attention to, and understand why some are “against” GD&T. Their opinions are based on negative experiences that are far too common in manufacturing. Those against find it easier to blame GD&T than to consider the reasons why they have experienced negative results. Misconceptions about GD&T come from:
- Inexperience,
- Lack of adequate training,
- Improper or incomplete implementation.
GD&T itself is not complex. Many product designs however are, and this gets reflected in the tolerancing specifications. If your parts are simple, the GD&T is simple. On the contrary, parts with many complex interrelated features require a precise language capable of describing allowable variation in size, form orientation and location relationships. It takes practice and experience to apply GD&T to complex parts. Engineers must accept that as they begin to apply the concepts they will make some mistakes. They will learn from these experiences and through analysis gain a better understanding how GD&T improves product design.
Lack of, or inadequate training compounds the problem. Sometimes engineers guess at what the symbols mean rather than consult the standard. Providing a solid grounding in the fundamental concepts through training helps engineers avoid errors improving the chances of successful GD&T implementation. Just as with learning a foreign language; some learn enough to ask simple directions and can find their way to the hotel, say please and thank you, or order a beer; while others, with practice, learn to communicate more fluently and discover wonderful insights from the people they meet enhancing their touring experience. Those that fail to study the basic rules or language structure speak unintelligible gibberish. They may eventually find their way to the hotel, but only after a frustrating, round-a-bout and likely expensive taxi ride.
Sadly many engineers graduate with just a few hours of GD&T instruction and then enter the workforce to be mentored by those, who themselves, have little understanding of tolerancing. It is left to individual companies to recognize the importance of tolerancing, and ensure appropriate training is provided. Because of the aforementioned misconceptions, many don’t.
Tolerancing in general, let alone GD&T, is arguably the most misunderstood and underappreciated quality initiative in engineering and manufacturing today. I use the term “tolerancing” because GD&T is only one component of a Dimensional Management (DM) strategy that is needed to understand the effects of manufacturing variation on the function, assembly, inspection and cost of producing a product. It takes knowledge from many individuals, from all parts of the organization to develop a complete understanding of the effects of manufacturing variation. The designer should not have to develop the tolerancing scheme in isolation. A systematic approach is need to document requirements, analyse the design, establish part tolerances, monitor manufacturing processes and verify conformance. Most manufacturers have some or all of these elements in place, but often missing is a DM strategy to coordinate and make effective use of the data collected. Perhaps this is another reason some GD&T efforts fail?
A DM team is made up of representatives knowledgeable in the application of GD&T, from design engineering, manufacturing and quality control. The DM team provides direction for the development of the product tolerancing scheme, focuses analysis efforts on the characteristics most likely to impact product performance, and coordinates the collection of measurement data. This ensures effective implementation, maximizes the benefits of tolerancing efforts and creates a spirit of interdepartmental cooperation.
A company just beginning to use GD&T should start by providing training in the fundamentals of GD&T to all employees that need to interpret the engineering drawing. Some employees such as design engineers will require advanced application skills and tolerance analysis training. As well, the company should strive to develop expert representatives from design, manufacturing and quality control. These are the individuals that will form the DM team, provide mentoring and resolve tolerancing issues.
Another important consideration is to ensure your DM team is qualified. The only way to prove GD&T proficiency is to pass the American Society of Mechanical Engineers (ASME) test for certification as a Geometric Dimensioning and Tolerancing Professional (GDTP). But that’s a topic for another day. For more information on GDTP certification see https://www.asme.org/shop/certification-accreditation.
Let me leave you with a quote that I think sums-up why manufacturers should put more emphasis on using GD&T:
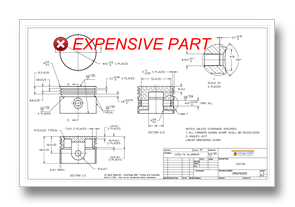
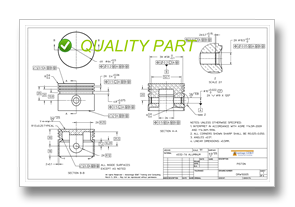
“Tight tolerance do not guarantee a quality part, only an expensive one” – Alex Krulekowski.
Doug Keller is Owner, Consultant and Instructor at Advantage GD&T Training and Consulting, and is certified by the American Society of Mechanical Engineers as a Senior Level Geometric Dimensioning and Tolerancing Professional.


